
Even though most e-Discovery projects involve image output (TIFF, JPG, PDF etc.), we find that the specifications of the output images are rarely discussed thoroughly. An important detail, which is usually omitted from e-Discovery processing specifications, is whether or not output images should be normalized.
Image normalization (in the e-Discovery sense) is the process of transforming images to make them consistent in terms of dimensions, resolution, color depth and orientation. For example, larger images can be resized to 8.5″x11″, landscape pages can be rotated to portrait, images with different resolutions can be converted to 300 DPI etc.
In our experience, the most frequently used image specifications in e-Discovery processing today are 8.5″x11″ portrait, monochrome images with 300 DPI resolution and CCITT Group 4 compression. Landscape images are typically rotated 90° counter-clockwise to portrait. When color for color processing is performed, color images are usually exported as 300 DPI JPGs. See Figure 1 below for an example landscape page that was normalized and endorsed.
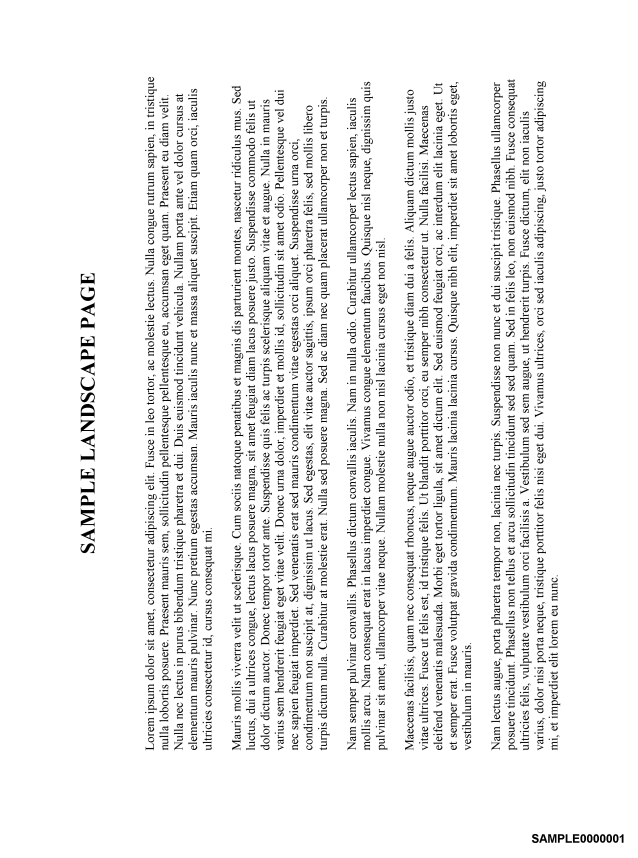
Figure 1 – Normalized and Endorsed Landscape Image
Advantages and Disadvantages of Image Normalization
Whether or not image normalization is required should be decided on a case by case basis. Some of the advantages and disadvantages of normalization are as follows:
Advantages:
- If images are normalized before endorsement, the size and location of the endorsements would be consistent among different pages in the data set. See Figure 2 for an example document processed using different page sizes and endorsed without normalization.
- Endorsing normalized images ensures that each page has the same amount of space for the Bates endorsement and confidentiality legend. Having images of various sizes can result in unexpected overlaps in endorsements on the smaller pages. See Figure 3 below for an example.
- If images are printed, using normalized images would prevent printing problems due to changes in page size and orientation. For example, some printing applications do not automatically rotate landscape pages and print them on a portrait page scaled down. See Figure 4 below for an example landscape page printed on a portrait canvas.
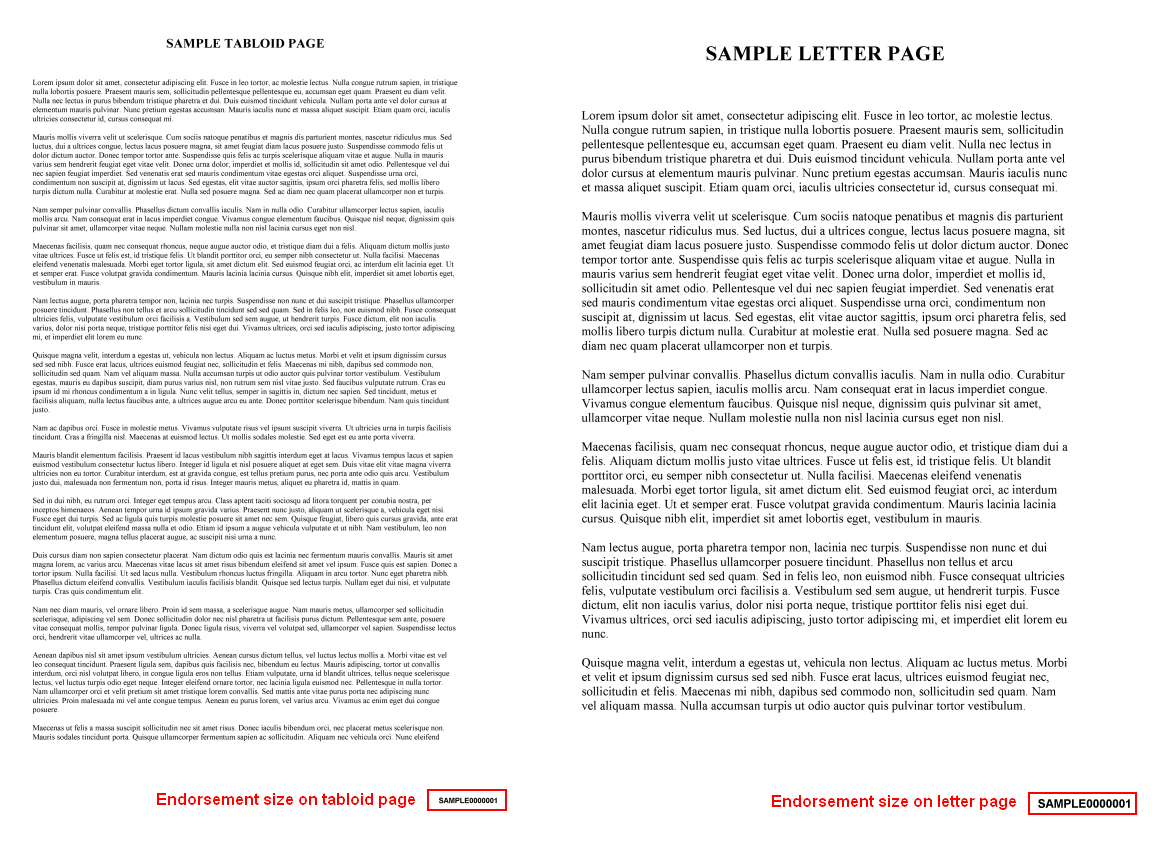
Figure 2 – Endorsement Size Difference without Image Normalization
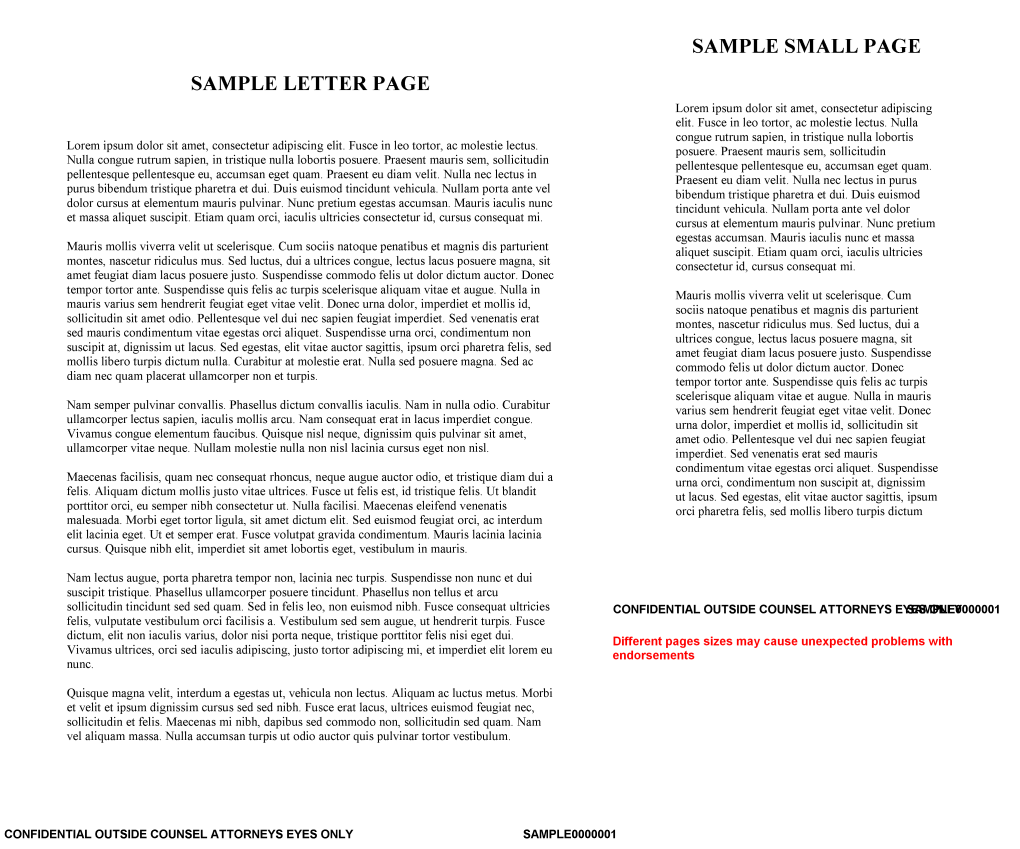
Figure 3 – Overlapping Endorsements
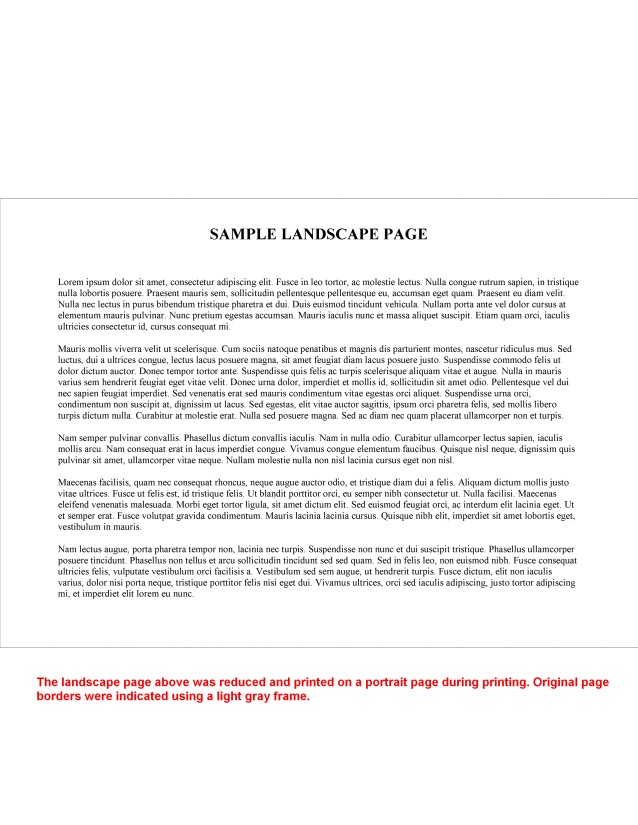
Figure 4 – Landscape Page Printed on Portrait Canvas
Disadvantages:
- Image normalization without proper quality control can result in legibility problems. For example, a 36″x24″, 600 DPI technical drawing would most likely become illegible if normalized to 8.5″x11″ 300 DPI.
- In some review platforms, landscape pages rotated to portrait may require the reviewers to either rotate the page or turn their heads sideways. This can be prevented by exporting a rotation flag along with the image reference file so that the review platform auto-rotates the pages to correct page orientation for review (if supported by the review platform).
- Using poorly designed normalization software can result in degradation of overall image quality.
- Image normalization can be a time consuming process and can add a significant amount of time to the e-Discovery export process in large cases.
How Image Normalization Should Be Performed
Image normalization should be performed with minimal impact to the original image quality. A few things to watch out for:
- Images smaller than what the normalization specifications require should typically be placed on a white canvas instead of being enlarged. Enlarging small images usually causes pixelation. See Figure 5 below for an example small image resized two different ways.
- Aspect ratio of the images should be preserved during normalization. For example, a 14″x8.5″ page can be resized to an 11″x6.68″ image, placed on an 11″x8.5″ canvas and then rotated instead of being resized directly. Resizing without preserving the aspect ratio can result in stretched, distorted images.
- If color images are being converted to B&W, proper dithering should be employed (e.g. the Floyd–Steinberg algorithm) to ensure that the B&W image is an acceptable representation of the original color image. See Figure 6 below for a color image converted to B&W with and without proper dithering.

Figure 5 – Resized Small Image
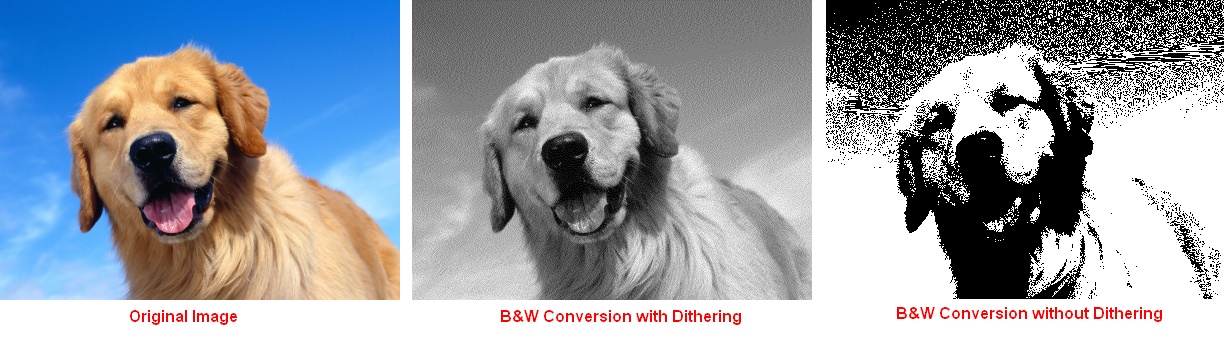
Figure 6 – B&W Conversion and Dithering
Conclusion
We believe that complete output image specifications should be included with every e-Discovery processing project. Legal teams should be aware of the advantages and disadvantages of image normalization and should make informed decisions on a case by case basis. In some cases, requesting the review database without normalization and normalizing images later before endorsement & production or blowbacks may be a good approach.